|
|
From the Boatshop
by Ron Magen
Letters to Ron
Glassing the Hull -- A Question
Hello, All.
I have the Dobler's exterior seams taped and am about to turn the boat
over to tape the inside seams. Before doing that, however, I decided to
sand the outer seams and grind the tape edges down. It took me 8 hours! To
that point, I had been contemplating "glassing" the boat to the sheer
line. Who here knows the pros/cons of such an enterprise and would like to
give me their 2 cents worth? I would appreciate it.
Dennis
___________________________
Dennis,
I tend to agree with the other comments you've been given, I jut like to
add a few notes.
To 'cut down' chunks, runs, globs of filler . . . try a SURFORM TOOL. They
come in different sizes & shapes, with replaceable blades. Wait till the
stuff is relatively hard - not 'rock-hard' but still in the
green stage, just beyond the fingernail impression stage. Comes off like
you are grating cheese. Be careful around the actual glass cloth . . . can
rip through quickly and leave a very broken-up surface.
Another thing to try, if you intend to use paint later, is to try XYNOLE
or one of the polyester cloths. Supposedly non-itch, easier to stretch &
form, and apply from a 'roll'. The downside is that they absorb more
resin, and stay white instead of becoming 'water clear' in the matrix.
[I've gotten a sample and am going to do some testing. If it proves out I
will use it on my next major project]
Regards,
Ron Magen
Backyard Boatshop
Epoxy curing
We are in the midst of our first experience with epoxy and would like
some feedback. We are remounting our bow pulpit and are adding fillets to
the holes. We are using West Systems epoxy with the slow 206 hardener and
used the pumps for accurate dispensing. We used 1 pump resin and then
mixed silica with it until just thicker than catsup and then added a pump
of the hardener and mixed well, following Dr. Judy's instructions. We put
it into a Ziplock bag and piped it into the holes. It has been 85 degrees
here and now, 24 hours later, we are drilling the holes. I must add that
since the holes are for 3/8" bolts, the larger holes for the fillets were
drilled to 5/8". So there is quite a bit of epoxy in them. I think the
epoxy seems a bit flexible. I expected it to be rock hard. It has some
give and is easy to drill. Is this normal or is something amiss?
Karen Jxxxx
1998, P-19, Miss Maggie, #1010
___________________________
Karen,
Two points;
1) Epoxy typically takes better than 30 days to get to 90+ percent
'cured'. It is a geometric progression so that it seems 'solid' at 8 to 24
hours, depending on the ambient temperature.
2) As a general rule, the 'low ratio' mixes tend to be 'softer' or retain
more flexibility than the 'higher ratio' {5:1, 6:1} Resin-to-hardener
mixes.
My base is the RAKA 5:1 'mix'. It is a 'moderate speed' type at the 77
degree Standard Temperature. Epoxies are time/temperature dependent. Think
of it as a 'balanced equation'. While we can't control time {at least not
yet} we can control temperature.
Mixing the filler into the resin before adding the hardener was a smart
move. However, one of the major causes of problems with curing is
insufficient mixing of resin & hardener. That is why it is usually
recommended to add fillers last. The mixture is also exothermic. To give
yourself control of 'open time' use the chemist's trick of using a
temperature bath. Put your container in a pan of cold water, and use a
large container to increase the surface {heat radiating} area during warm
or hot weather; warm water and a smaller container when it's below 60
degrees.
Another advantage of the RAKA formulations is that you can combine
hardeners to 'fine tune' the mix. It takes a little forethought and
volume-marked containers because you are 'mixing' BOTH ratios {5:1, 2:1}
and amounts {x parts 5:1 hardener + y parts 2:1 hardener to z parts
resin}. Not as complicated as Celestial Nav, just a little thought. It
will allow the ultimate balance, and if you take good notes, easily
repeatable.
Regards and good luck,
Ron Magen
Backyard Boatshop
Epoxy Life - Without UV Protection
A thought on UV protection (MAS epoxy).......is there anyway to
retain a bright finish with spar varnish over clear epoxy. I would hate to
cover up the grain of this $8 Lauan 1/4 inch ply. And does anyone have
personal account of epoxy longevity?
Mike in Mississippi (we have sun!)
___________________________
Mike,
You have answered your own question - Varnish.
SPAR varnish is a 'long oil' type and never 'really' gets hard. It's
original purpose is in it's name; to coat and protect wood spars, yet
allow visual inspection. It remains 'flexible' just as the spar is
flexible to take the strains & pressures of the rigging. DO NOT use on a
surface that will be sat upon or handled.
'Short oil' type varnishes do 'cure' to a hard state and can be handled or
have things placed on them without sticking. I used this type most
frequently, and apply a good coat of paste wax for further protection. In
the case of a rudder that I refurbished, the last coats of wax were a
Teflon 'boat wax' to improve the 'critter & slime shedding' yet allow the
Red Mahogany to show through.
These varnishes are available in the 'traditional' Amber hue, or the
'water clear' variety . . . just check the advertisements in almost any of
the nautical magazines.
Some years ago, just as an experiment and because I had some already
mixed, I brushed some 5:1 epoxy on a piece of 1/4 Lauan that I used to
replace a broken window in my back door. The window panel was on the
bottom half of the door, and I was using the wood because our Malamute
would 'knock' when he wanted in. I gave it a couple of not carefully
applied coats of varnish. It was exposed to all the weathering of a
Philadelphia suburban climate, plus the 'insistence' of a 120 pound
Alaskan Malamute. It started to look a 'little worn' after 3 years, and
some wood showed through after about 5. I turned it around to the 'epoxy
only' side and got another 2+ years out of it.
Just think what you can do with some simple maintenance; quickly
'touch-up' any chips or nicks, and give it an occasional 'freshening' coat
annually or when YOUR environment requires it.
Regards,
Ron Magen
Backyard Boatshop
Gold Paint - Revisited
"Steve" wrote:
A few months ago someone wrote about people looking for a source for
gold paint. In years past, I had searched and searched for gold paint
without much luck. It seemed there was nothing available for exterior use
and the gold paint sold to sign painters didn't stand up very long in the
marine environment.
I just came across a product that is sold by AWLGRIP. It's Gold
Metallic Powders that you mix with their Low Solid Clear Urethane topcoat
(G3003). They offer a Pale Gold (5083) AWL # 73010 or Cordovan Gold (5093)
AWL #73011.
I've never seen it in any of the marine stores, but it is listed in
Fisheries Supply Catalog, here in Seattle. I would expect that it could be
special order from other dealers of AWLGRIP paints.
Steve
S/V Good Intentions
___________________________
Steve,
From what I understand ANY AWLGRIP product is EXPEN$IVE !!. If it indeed
has GOLD in it, then the user had better be privately endowed.
The usual reason for 'tarnishing' is oxidation; therefore if the surface
is 'protected' from the oxygen in the air, it should retain it's original
'tone' for some time.
Even Gold Leaf comes in different 'carets' and tones . . . as well as
'imitation Gold Leaf'. Personally, my idea of the gold 'color' for boat
work is more of a 'Burnished Bronze' look.
I have a few small bottles of 'metallic gold paint' with some complex
application schemes. {When SOMEONE wants to PAY for my 'learning curve',
then I'll use real leaf}.
Most recently I got a QUART of 'oops paint' at Home Depot. It was
'Ballroom Gold' {by a 'well-known designer'} and only 50 cents . . . so I
added it to my 'collection'. Although it is specified for indoor use, I
have made several items which have been outside for SEVERAL MONTHS. One
use is on a series of 'Boat Planters' I made for my wife & others, and the
other is in my carved shop 'sign'.
The basic concept was to apply it in a similar fashion to the method used
for gold leaf. For the 'Boat' it was the 'Bow Eye'. Although the original
plan called for white trim, I varnished the Mahogany foredeck, and wanted
the eye to complement it. First I dry fitting the piece and pre-drilled
the screw holes. I sanded the piece of Red Cedar, then sealed / 'sized' it
with a thinned coat of varnish. After the varnish cured, I lightly sanded
it and applied two coats of the water-based Ballroom Gold Acrylic. Again,
sanding carefully between coats. After it dried, I applied several coats
of Spar Varnish in the usual manner.
The sign was almost the same, but with a twist. Because the letters were
'engraved' and not a separate piece I had to think about removing excess
material. BEFORE I did the hand-engraving, I stained the blank and gave it
a couple of coats of short-oil varnish to seal & smooth it. I then placed
my templates and carved away. After cleaning up the letters, I gave them a
coat of varnish, wiping off the excess, from the 'cured' surface, with a
swipe of mineral spirit moistened paper toweling. Then followed about four
coats of the gold paint, heavily dabbed & dribbled into the letters, again
with the excess easily wiped away. This was then followed by about four
coats of Spar.
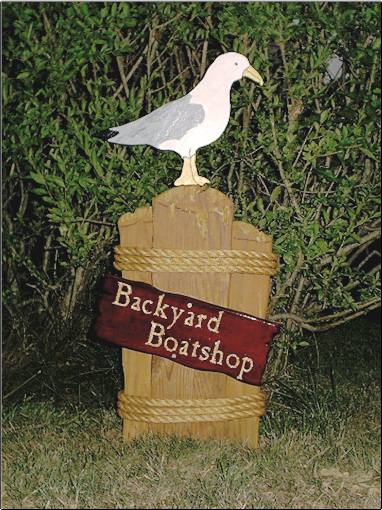
To see how that turned out, look at this illustration from my
column about people stealing things.
Regards,
Ron Magen
Backyard Boatshop |