|
OK, guys. You know who you are. Let’s first
dispose of the macho nonsense. Sewing is not “women’s
work”. Traditionally tailors were men, and most
sailmakers still are. Besides, a sewing machine is
a power tool, after all. Indeed, it has an important
part in the history of power tools. Not only did textiles
drive the entire industrial revolution, but we now
have jigsaws because a German carpenter named Bosch
thought he could get more done if he attached a saw
blade to a sewing machine mechanism. Enough said,
I hope.
But we probably won’t jump in with a sewing
machine if we just need to patch canvas. Every book
about canvas work makes a big deal about hand seaming,
but most of us aren’t really going to pull enough
thread to get very good at it. But here is one stitch
that’s really handy to know.
The Herringbone Stitch
I learned this stitch HERE,
but it’s sort of hard to find unless you’re
looking for something else. And I thought it could
use some photos. So here we go.
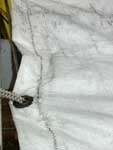
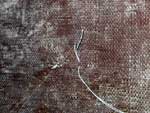
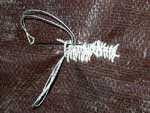
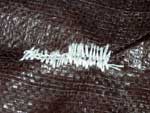
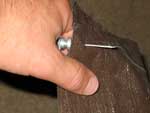
This is the stitch that pulls a tear together. You
can see why it’s handy. Here’s where my
cover tarp started to tear at one of the grommets.
 |
Click images for larger views |
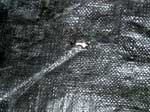
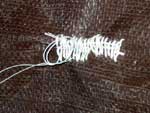
It’s not pretty, but it’s strong. In
fact, the uneven stitch adds strength. You don’t
really want all the stitches pulling on the same warp
in the cloth. The concentrated force will just un-weave
the fabric. The drunken stitch spreads the load.
So how do you do this thing? Leave the thread doubled
for strength, the length about the same as the length
of your arm. If your seam is longer, just finish up
and start a new one. It’s needlessly awkward
to pull a really long thread. You don’t really
need a seaming palm unless you’re going through
really thick stuff. If you don’t need it you’ll
find it gets in the way.
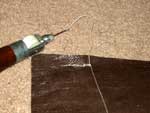
First reel off an arm’s length or so of sail
twine. You can go up to double an arm’s length
before it starts getting inconvenient, as long as
you’re doubling the thread. Then thread your
needle. It helps to cut the thread diagonally.
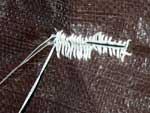
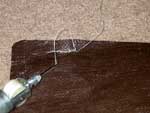
For our example we’ll look at a hole in polytarp.
I didn’t have any real holes in brown tarp,
so I had to make this one. It’s not as frayed
as is typical, but I think you’ll get the idea.
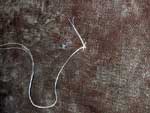
Imagine a line through the slit in the fabric. This
will be the centerline of our stitch. Insert the needle
on the centerline and bring it back through maybe
1/8” to the side of this line. Leave a tail
about the length of the intended seam.
Then insert about 1/8” to the other side of
the centerline and exit on the centerline.
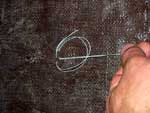
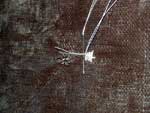
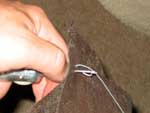
Now we’re going to make a clove hitch around
the wide loop we’ve made. I should have pulled
the loop flat first, but I left it a little loose
for illustration. From the side toward the tear, run
the needle under the loop.
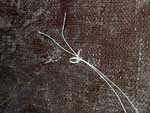
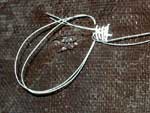
Then do it again.

Then run the needle toward the tear, under the loop
you just formed.
When pulled tight it looks like this.
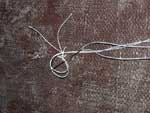
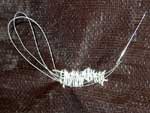
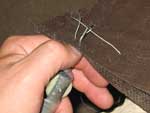
I made a couple stitches to get to where the tear
starts. Here’s how each stitch goes. First insert
the needle into the tear, and bring it back up over
to one side of the centerline.
Then insert on the other side of the centerline
and bring it back up through the tear.
Be sure the needle comes up over the top of the
new stitch. The thread should hold down the middle
of the wide stitch. You can see this in all the preceding
stitches.
To finish this stitch we make another clove hitch.
First run the needle under one of these loops from
the far side.
Then do it again.
Then run the needle back through the loop you formed,
just like last time.
Don’t be confused by the “jump over”
stitch being right in the middle of the clove hitch.
It won’t cause any trouble. After you pull the
hitch tight, run the needle under the stitch to protect
the standing end.
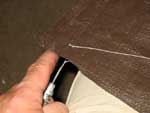
And cut it.
Not beautiful, but functional.
The herringbone stitch is specifically for closing
up gaps. But it’s no good for sewing on patches.
There is a much easier way to do that than hand seaming.
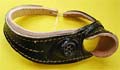
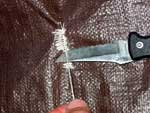
The Sewing Awl
For under $15 you can get one of these.
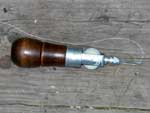
It makes a lockstitch pattern exactly like a sewing
machine. But it takes a little more effort from you
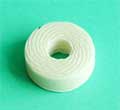
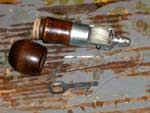
to make it happen. First get it threaded. The needles
and tool are in the handle. The thread must be well-waxed
or it will unspool most annoyingly. You have to remove
the spool to spool the twine. Then run it through
the needle chuck and replace the spool. Add the needle
so the thread is in the needle’s slot. Tighten
the collet and stow the tool and the other needle
back in the handle. Then thread the needle. The instructions
tell you how to do all this, but once you’ve
done it you will never need to look at them again.
It’s that easy.
When you’re ready to sew, poke the needle through
the fabric.

Put your thumb on the spool so it won’t unwind
and back the needle out partway. This forms a loop.
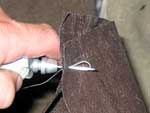
Grab that loop and pull it through. Pull out thread
equal to about twice the length of the seam. Make
it at least 18”, though.
Pull the needle back through and poke it through
again one stitch-length from the first hole.
Put your thumb on the spool and back the needle out
partway again. Remember that loop that opens up? Run
the end of the thread through the loop.
When you pull the needle back through it looks like
this. The thread is trapped.
That is the look of lockstitch when there is not
enough tension on the opposite side. So apply that
tension by pulling on the awl with your thumb locking
the spool. The stitch will pull through to the other
side. By balancing the tensions, you will be able
to nestle the knot in the middle of the fabric, which
is where you want it. Hidden, protected and locked,
hence the term “lockstitch”. Both sides
look about like this.
Notice that I changed to zigzag. All you need to
do is alternate the position of the needle. Indeed,
this is all a sewing machine does to accomplish this.
(Zigzag is favored for sail work because it’s
stretch better matches the sail cloth. This prevents
puckering.)
Those are the steps – repeat until you’re
done or your neck it too stiff to sit there anymore.
To end the seam we need a knot. I’m not sure
this is the One Right Way to do it, but I start by
pulling the end through to the same side as the awl.
Then I make a surgeon’s knot, which is just
a square knot with extra turns on both sides. If you
fish you probably already know that.
What can this thing do?
Here’s an example
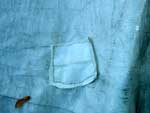
Not beautiful, but it does the job.
Like any hand sewing, the scope of these techniques
is limited only by your patience and supply of thread.
To do any large project you’ll probably want
a sewing machine. So next time we’ll look at
how to find an old sewing machine and get it running.
Rob Rohde-Szudy
Madison, Wisconsin, USA
robrohdeszudy@yahoo.com

Other Articles by Rob Rohde-Szudy:
|